Applies to: All shared and reseller hosting clients using CWP (Control Web Panel).
Overview
Welcome to your CWP (Control Web Panel) User Dashboard! When you log in for the first time, it can be helpful to have a quick tour. This guide will walk you through the main sections of the panel to help you get oriented and find the most important tools.
The CWP dashboard is designed to group common tasks into logical categories, which you can see in the navigation menu on the left-hand side.
1. The Main Dashboard (Your Landing Page)
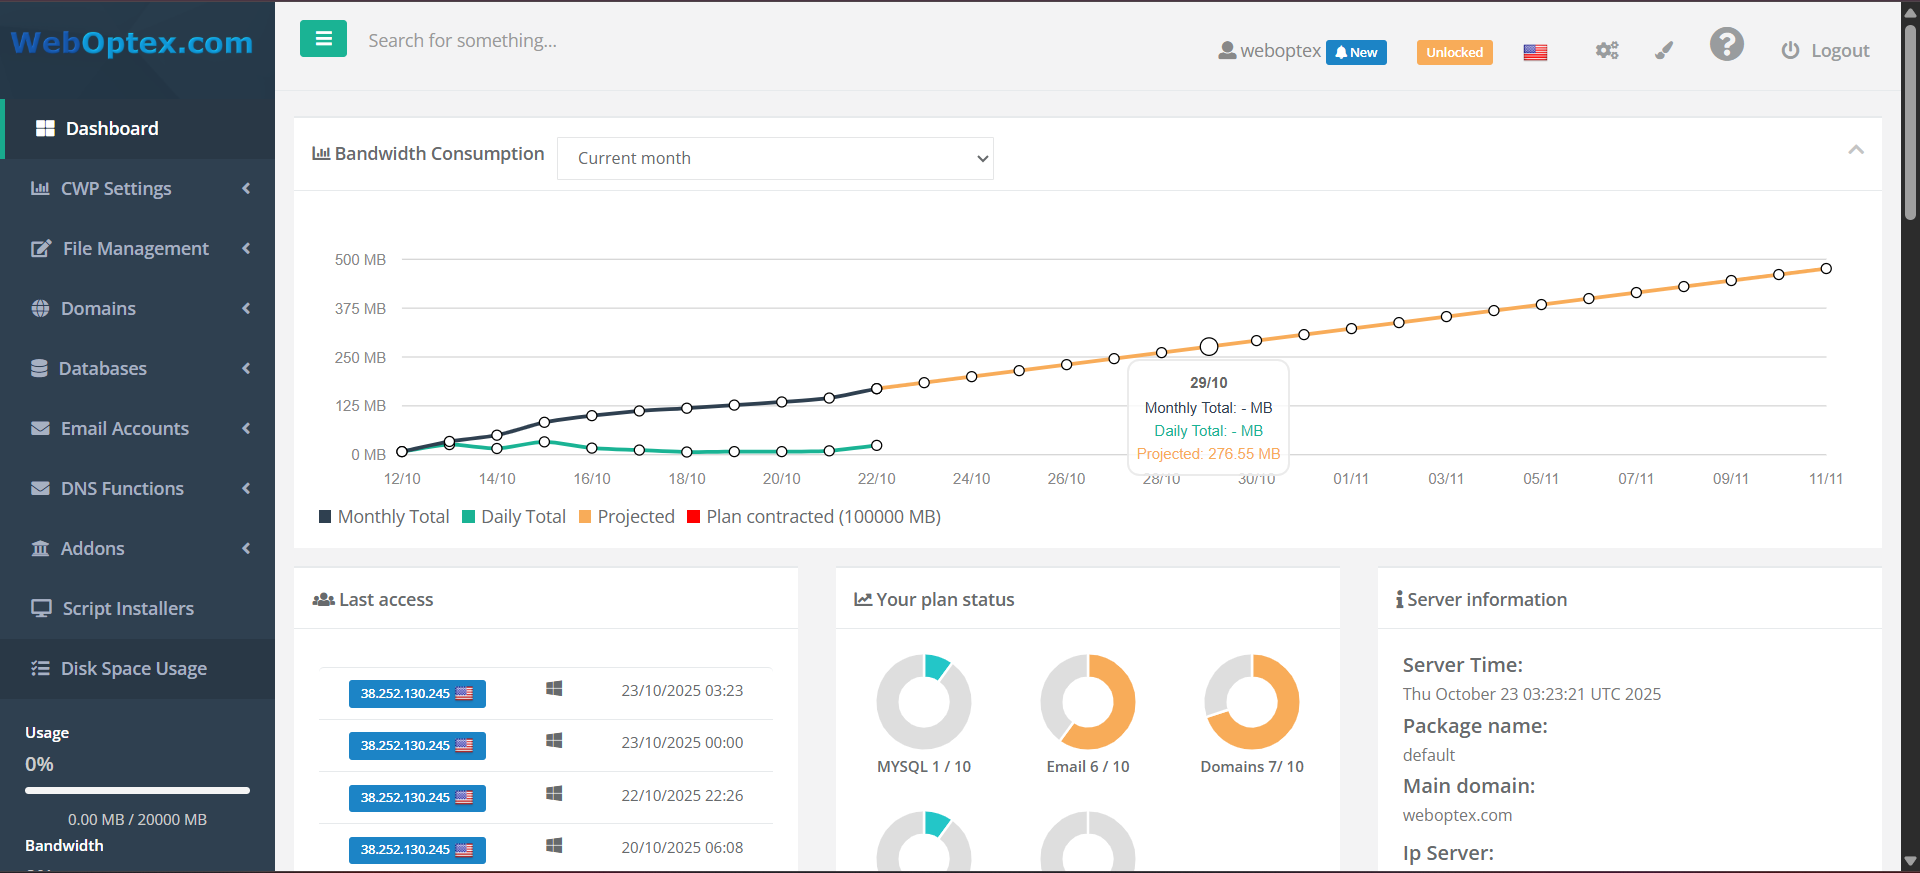
When you first log in, you are greeted by the main dashboard. This page provides an "at-a-glance" summary of your hosting account's resource usage.
You can quickly see key statistics such as:
-
Disk Usage: How much storage space your files and emails are using.
-
Bandwidth Usage: How much data has been transferred to and from your site.
-
Inodes: The total number of files and folders on your account.
-
Account Details: Your primary domain, username, and the server's shared IP address.
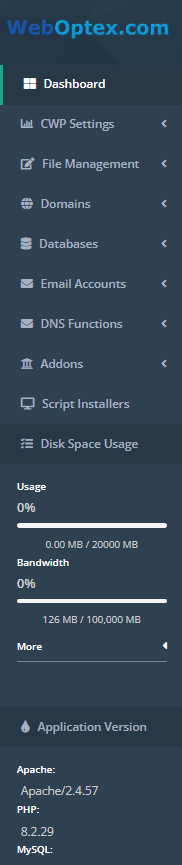
2. The Navigation Sidebar (Your Main Menu)
On the left side of your screen is the navigation sidebar. This is your primary menu for finding every tool in the control panel.
The sidebar is organized into categories like Domains, Email Accounts, File Management, and Security.
Pro-Tip: The Search Bar at the top of the sidebar is the fastest way to find anything. If you want to add a subdomain, just type "subdomain" and the menu will instantly filter to that option.
![]()
3. Guided Tour: Key Feature Sections
Here is a brief look at the most commonly used sections in the sidebar.
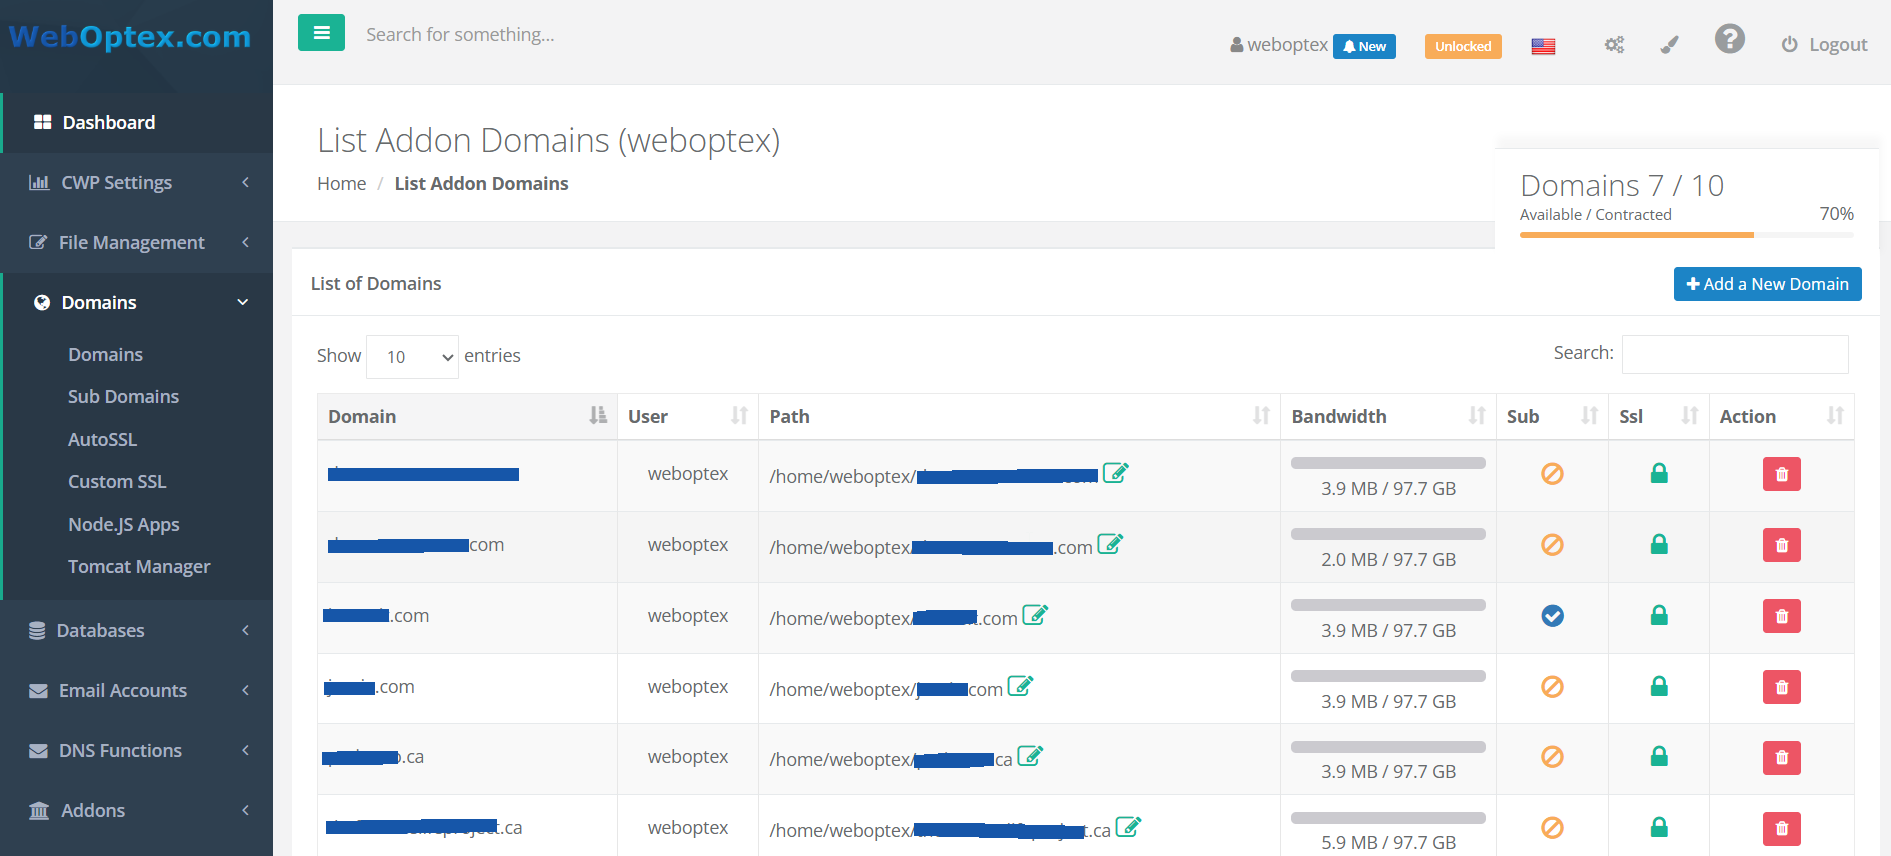
Domains
This is where you manage all the domain names associated with your account.
-
Domains: Used to add brand new domains (addon domains) to your hosting.
-
Subdomains: Used to create subdomains (e.g.,
blog.yourdomain.com).
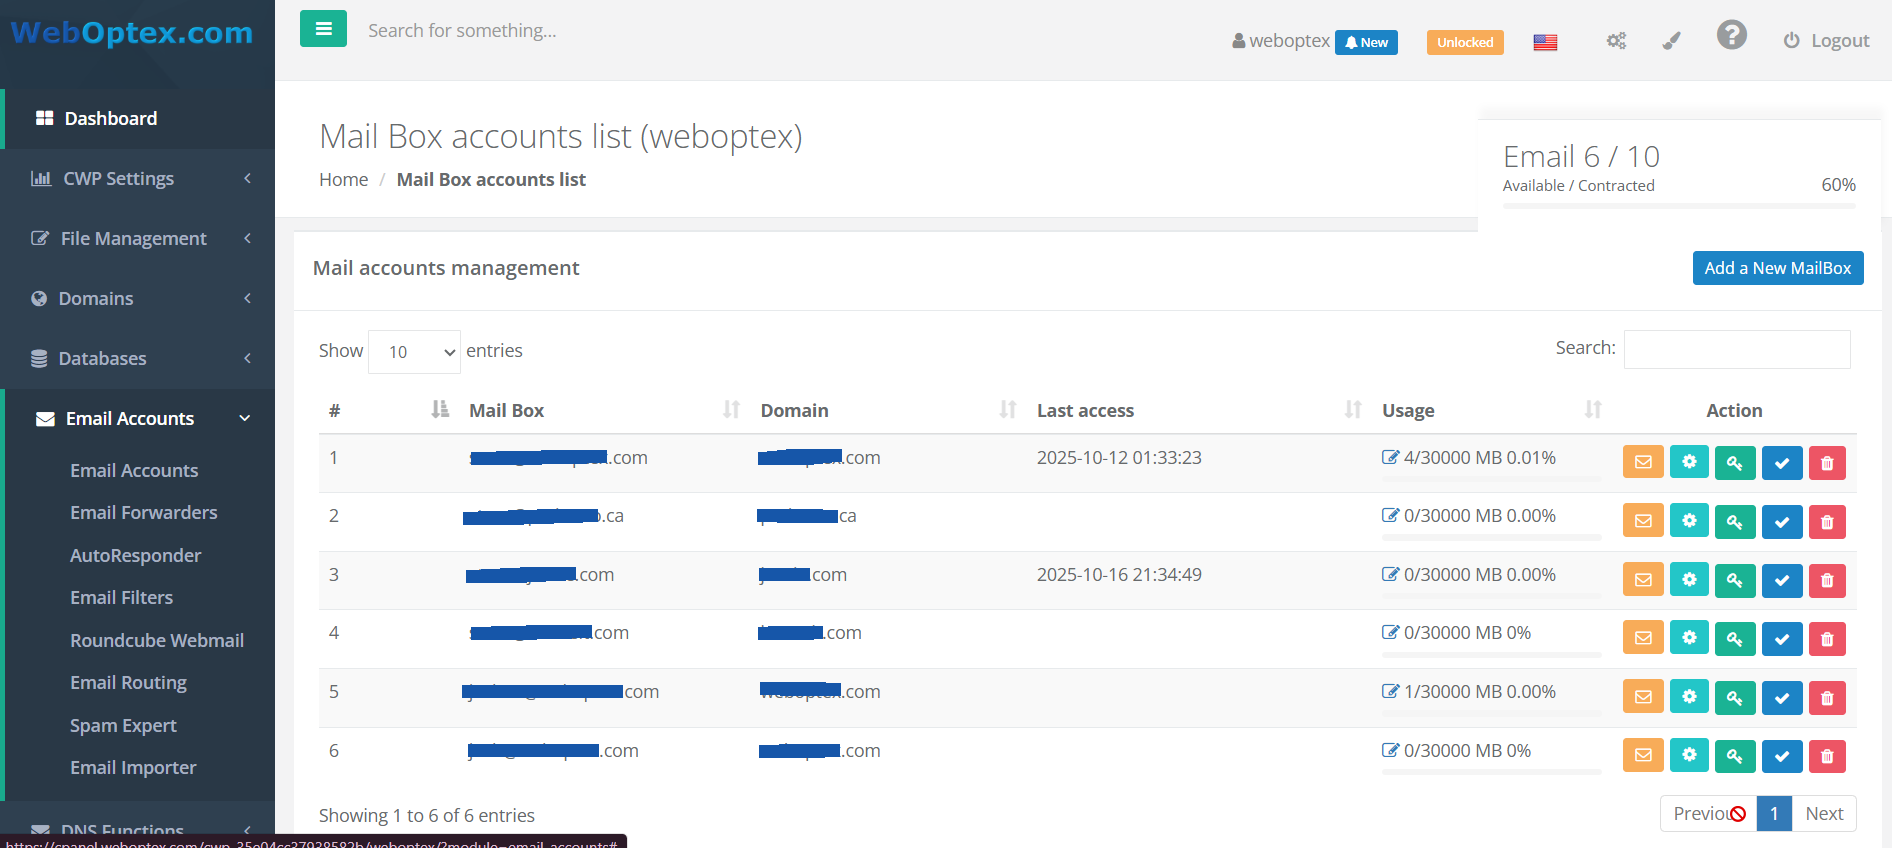
Email Accounts
This section controls all aspects of your email service.
-
Email Accounts: Create, delete, and manage your email addresses (e.g.,
you@yourdomain.com). -
Email Forwarders: Set up an address to forward to another (e.g.,
info@yourdomain.com->your.personal@gmail.com). -
Webmail: A quick link to access the webmail login screen (usually Roundcube).
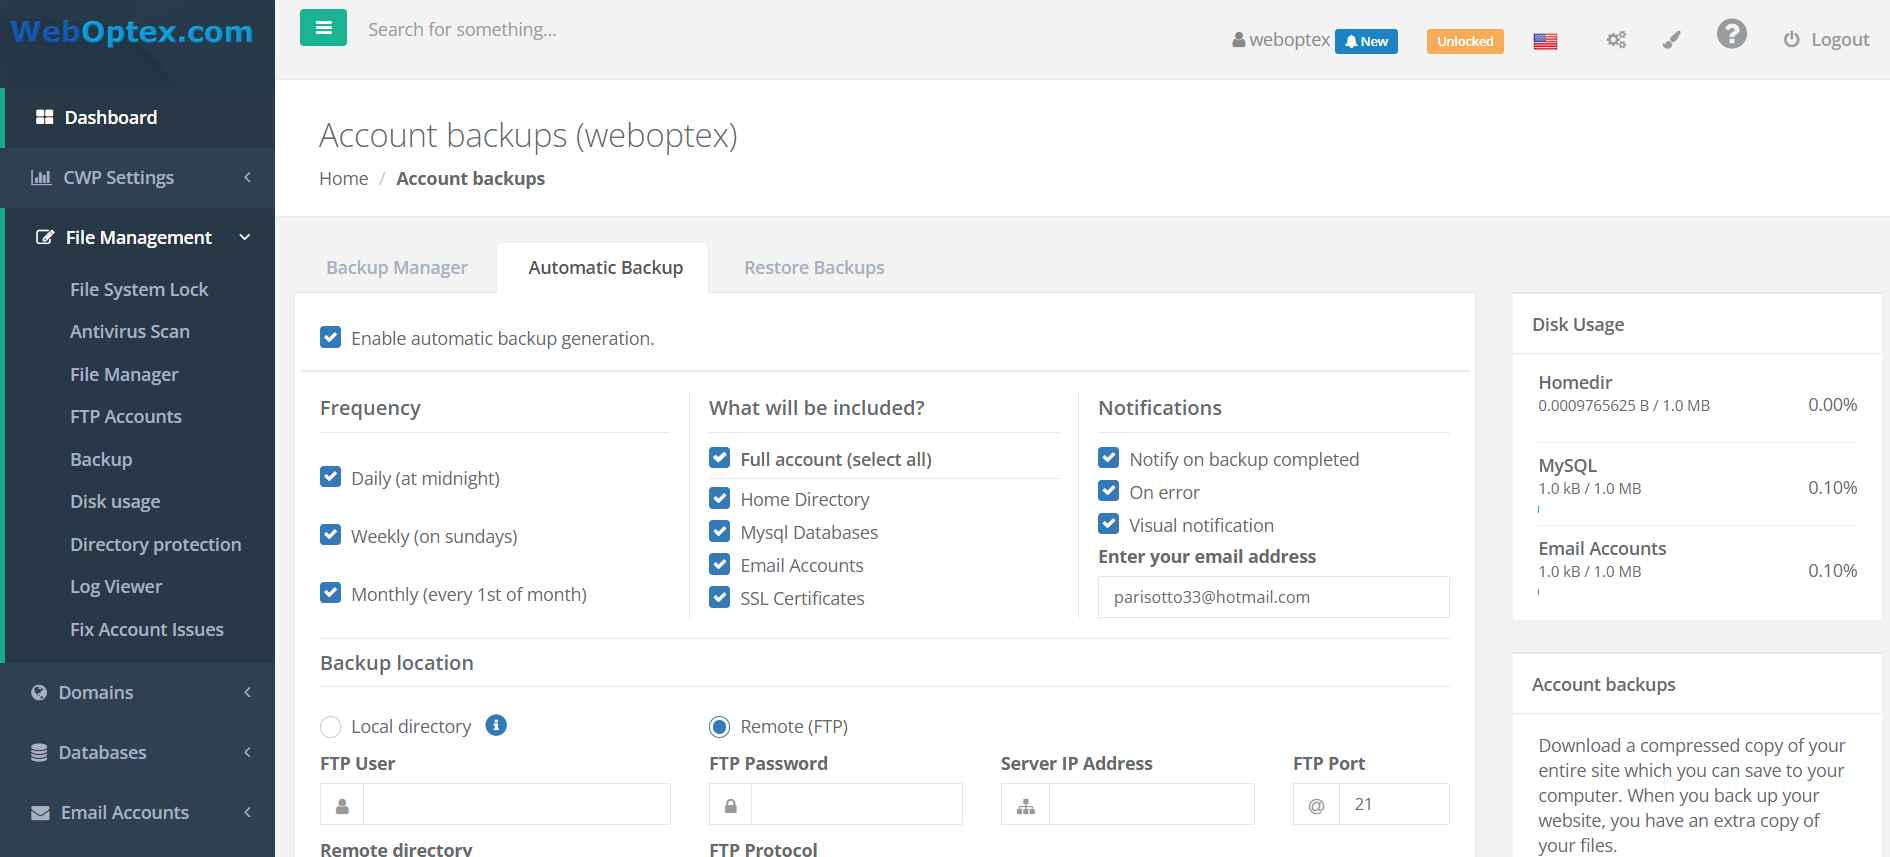
File Management
This is where you directly access the files and folders for your website.
-
File Manager: The most important tool in this section. It allows you to upload, download, edit, and delete files directly in your browser.
-
FTP Accounts: Create special accounts for uploading files using a desktop client like FileZilla.
- Backup Management: Manage manual or automatic backups of your files.
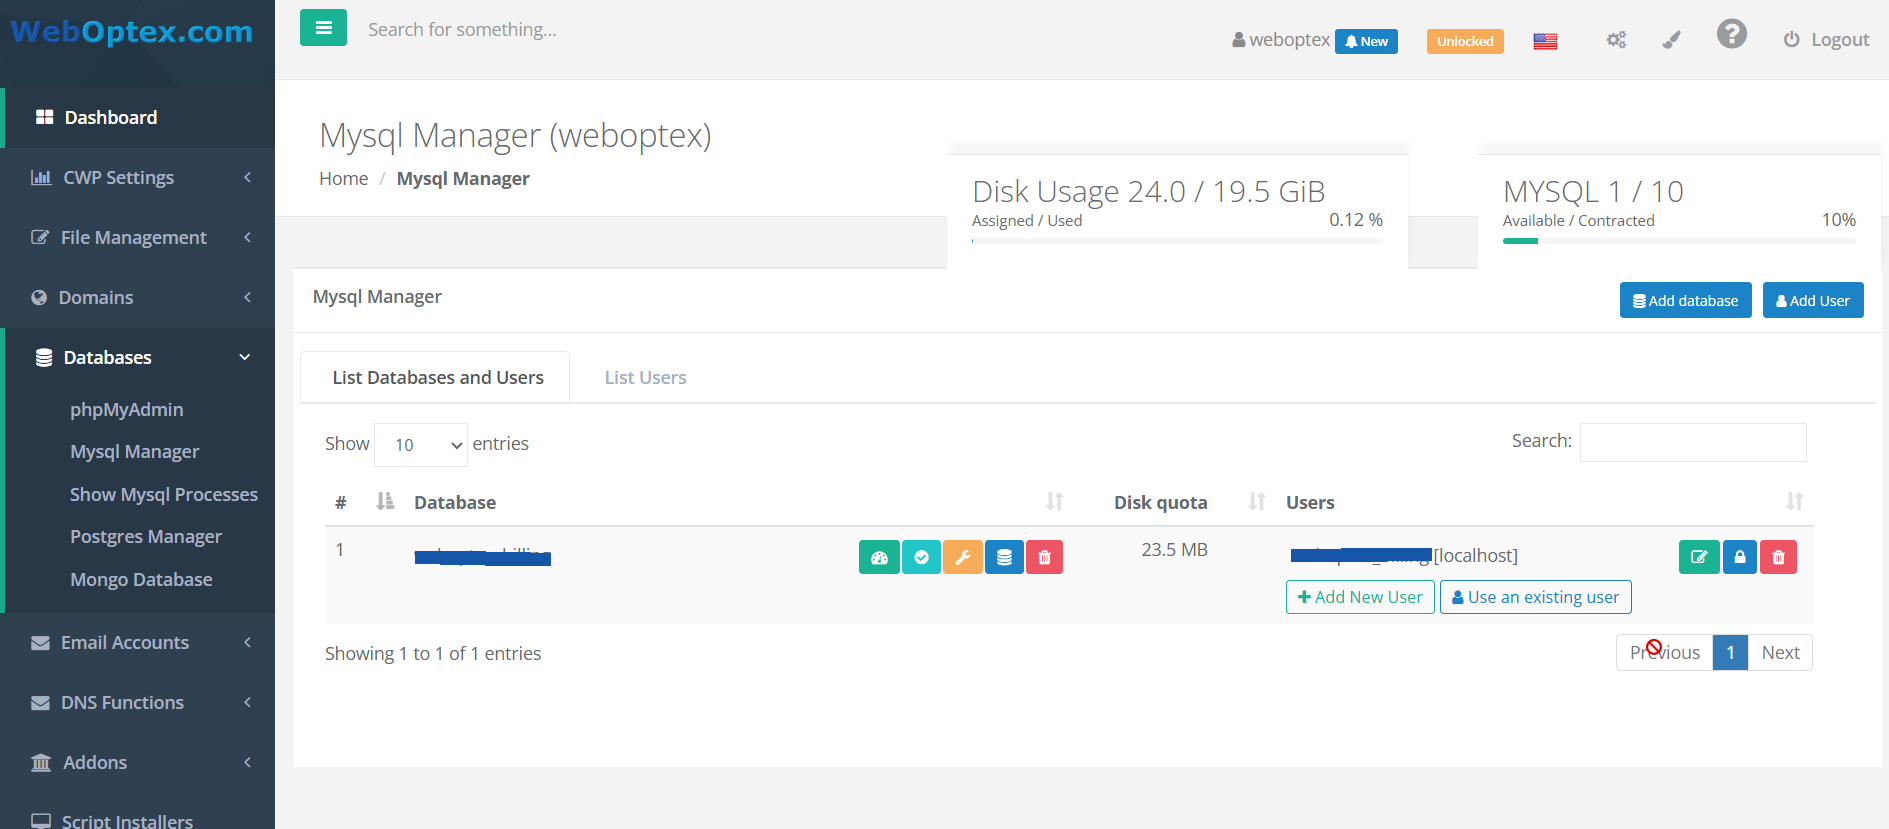
SQL Services (Databases)
This is where you manage the databases that power modern websites (like WordPress, Joomla, etc.).
-
MySQL Databases: Create new databases, database users, and assign user permissions.
-
phpMyAdmin: A one-click-login tool for managing your database contents directly.
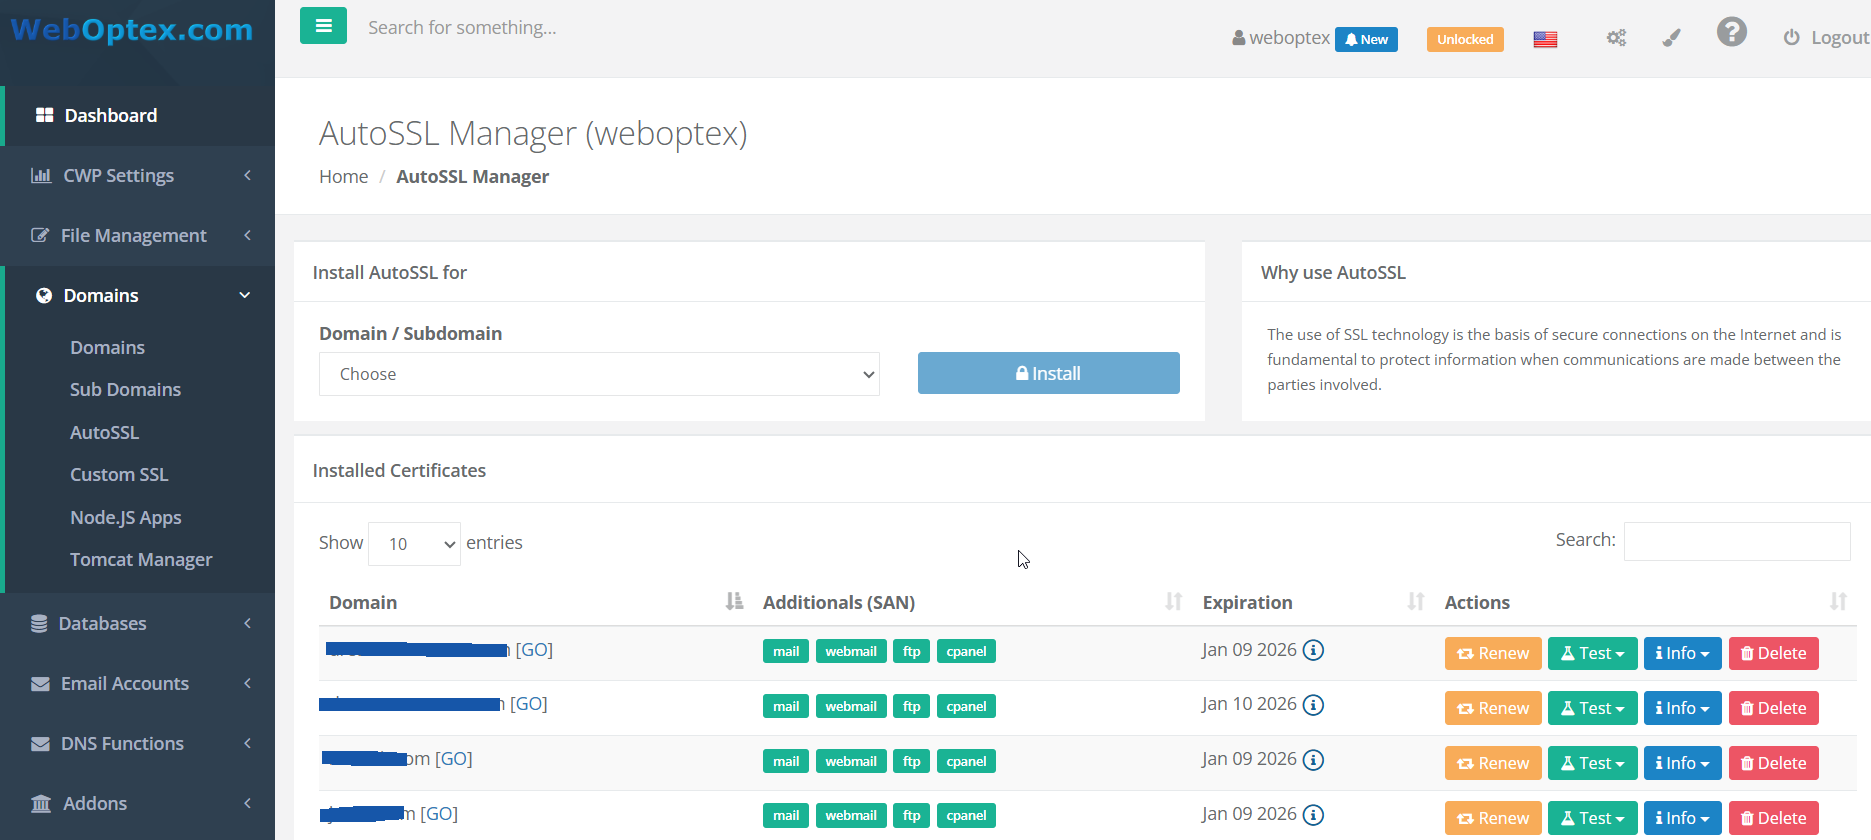
Security
This section contains tools to secure your website.
-
AutoSSL (Let's Encrypt): This is the most important tool here. You can install a free SSL certificate for your domain, which enables
https://and shows the padlock in a visitor's browser.
4. Logging Out and Changing Settings
At the very top of the navigation, you will find your account name and the Logout button. You can also find account-specific settings here, such as Change Password.

Next Steps
The best way to learn is to click around and explore. Now that you know where the main tools are, try a specific task.
